The dashboard will be available once you have created an account for yourself and your organisational record. It is usually done by starting a new campaign you coordinate or joining an existing campaign coordinated by another organisation.

User settings
The icon on the top right corner opens up the User menu.

When opened, there will be “Logout” and “Edit profile” options, with the list of all organisations of which the user is a member.
Users can see only one organisation account at a time. To switch between them and be able to see other organisations’ data, select its name from this dropdown menu.

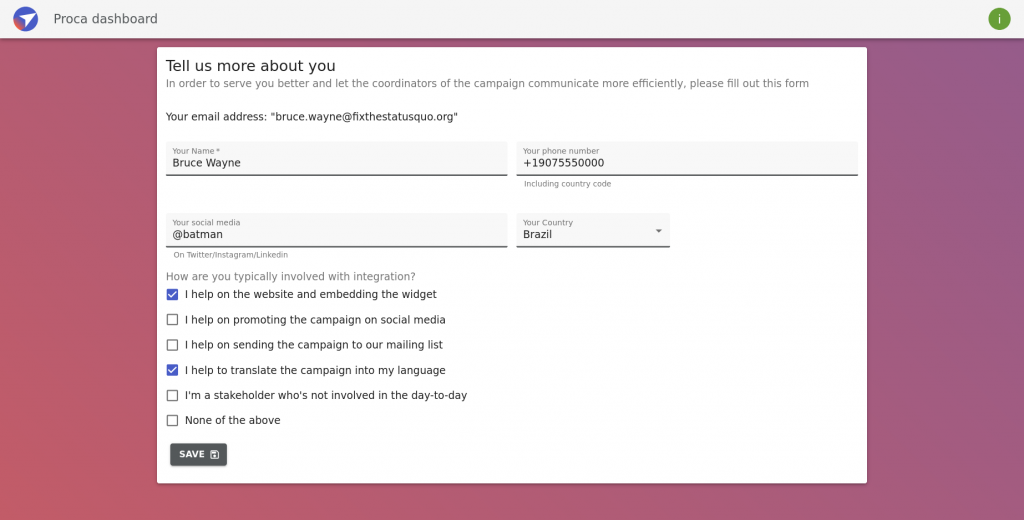
To edit your data, select the “Edit profile” option. It will take you to the https://we.fixthestatusquo.org/profile page, where you can change your contact information. We request this information on onboarding or the first sign-up if you don’t have it stored in our database already.
Organisation Page
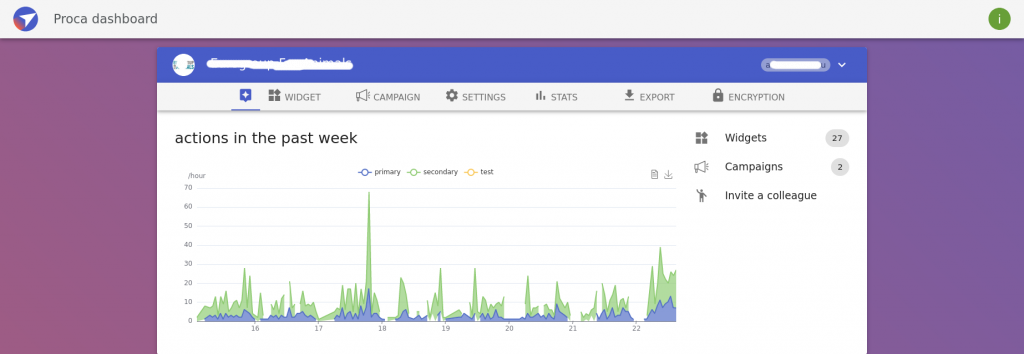
The organisation overview (last week’s statistics and a number of widgets) is on the main tab.
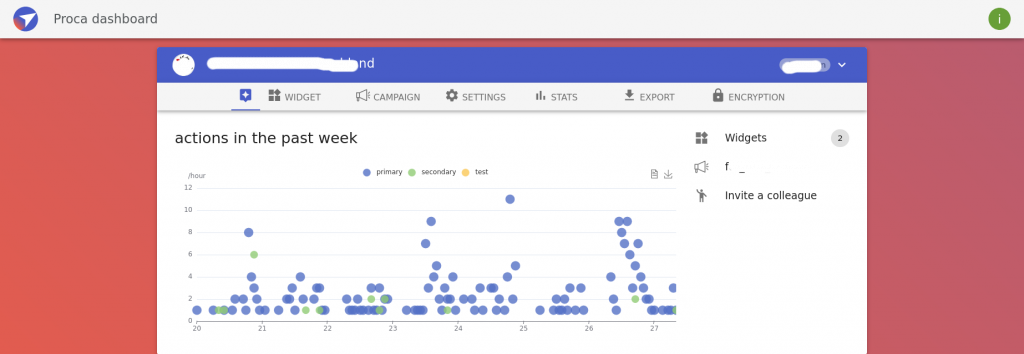
There is also an “Invite a colleague” option, which you can use to invite other people (usually team members) to join your organisation.
Note: This is only to join your organisation; there is a different mechanism to invite someone from another organisation to join your campaign as a partner — see the Campaigns section.
The Widget tab contains the list of your organisation’s widgets:
Widgets lists
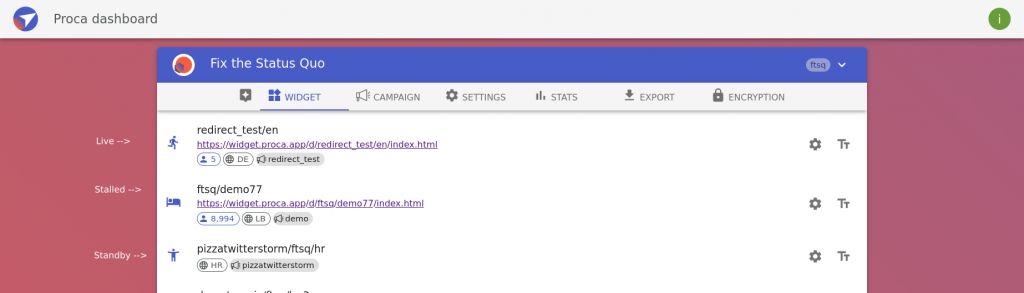
The icon on the left shows the status of the widget (running/live, stalled or not used/standby)
The URL is the last location where the widget was accessed; if the widget is embedded and in use, that would be its website URL.
Under the widget URL, there are a number of supporters (person icon), the language of the widget (planet icon), and the name of the campaign (megaphone icon).
On the right side are links to the widget’s settings page and widget text page.
If you click anywhere on the blank surface of the list item, you will be redirected to the widget’s main page.
The list of all campaigns the organisation owns or has joined as a partner is on the Campaign tab:
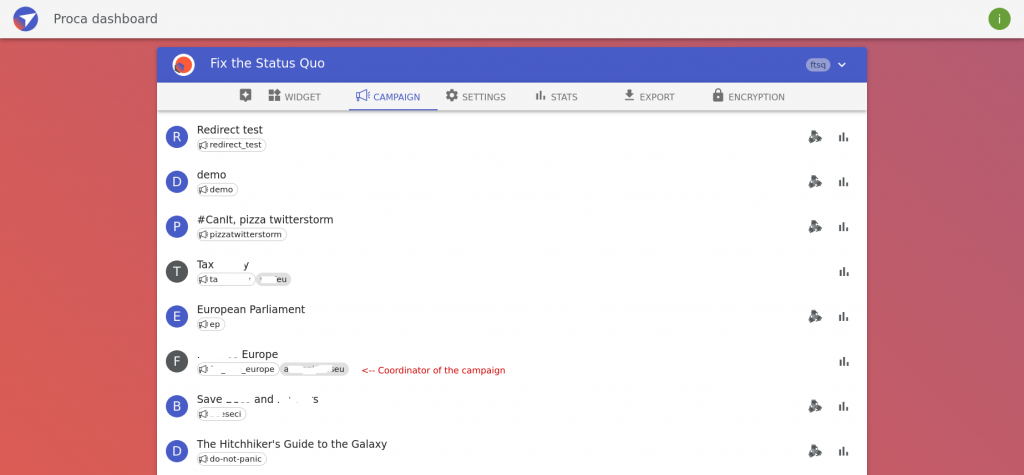
If your organisation does not manage the campaign, next to the name of the campaign will be the name of the coordinator (marked on the screenshot).
Icons on the right are links for the campaign partner’s tab and campaign stats tab.
The button to ‘Add Campaign’ at the bottom of this tab can be used to add a new campaign, but only use that if you want to add a new campaign!
The Settings tab gives settings for your organisation, which are largely the same as the ones entered in the Join Process:
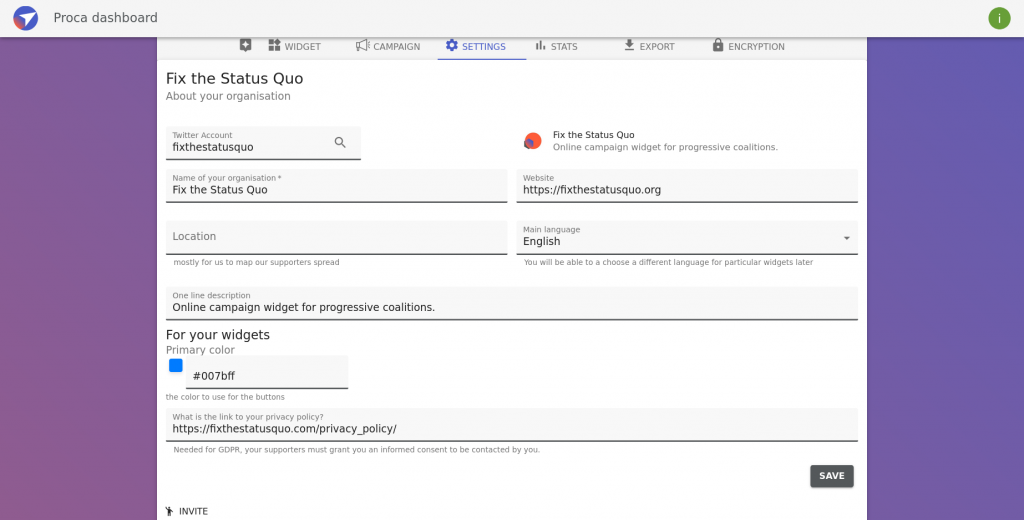
If these aren’t already entered, the screen starts like this:
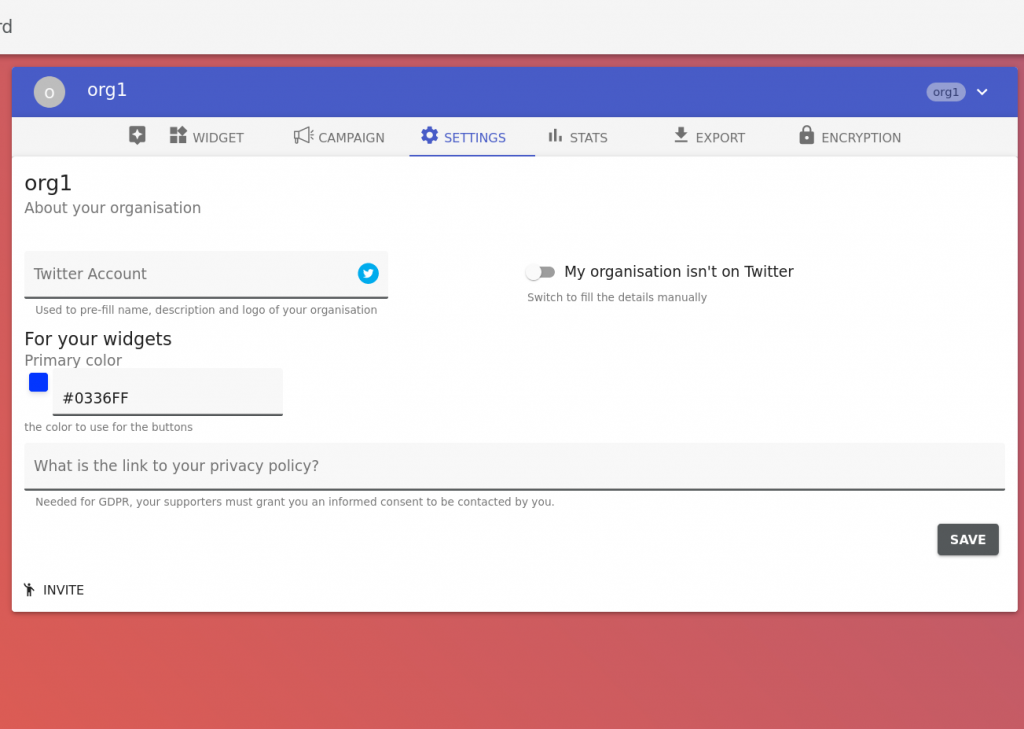
The Twitter lookup copies some public information on your Twitter account by typing your Twitter handle into the field and pressing the magnifying glass button.
Or you can click the ‘My organisation isn’t on Twitter’ toggle to make the fields pop out. This information is mostly internal, but the privacy policy link does go into the widget.
The Privacy Policy link is needed for GDPR for supporters who opt-in to being contacted by you in your widget. If it is left blank, then our default GDPR consent message will be used, but you should put your own message in that explains better what you will do with opt-in data. If you are not collecting any supporter data, you can leave this field blank.
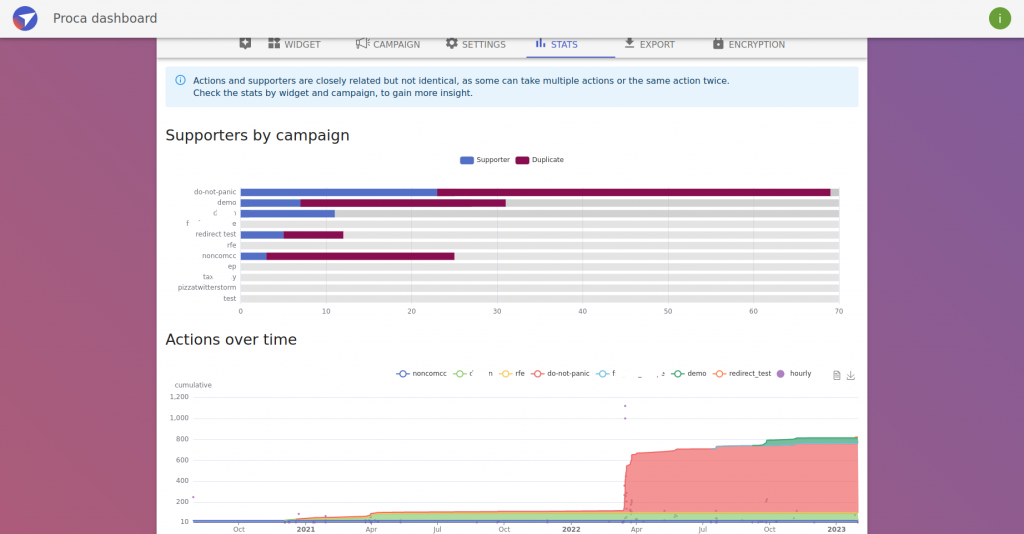
Statistics at the organisation are on a Stats tab:
The Export tab gives many options for exporting data.
The top drop-down lets you specify which campaign to export if you want to specify one.

There are a few GDPR options:
- “Opt-in:” people who clicked the “yes, I want to receive emails” button
- “Double opt-in”: people who clicked the link to confirm in a Double-Opt-In (contact consent) Email. This is only relevant for organisations that set this up!
- Opt out: people who chose “no, I do not want to receive emails”
Contacts export people’s contact information only; Activities export all the actions taken, eg, register, social media shares, etc.
CSV will be the file format you want unless you know you want a JSON.
If your data is encrypted, load the encryption key.
Then, press the Export button at the bottom to download the data.
If you wish for collected data to be ‘Encrypted at Rest’, which keeps it secure, then you can do this on the Encryption tab. If you do not do this, it will be encrypted when it is transferred but not stored in an encrypted manner.
Note: Encryption means that data cannot be unlocked without the Key. This allows data to be securely protected, which is part of the decentralised security that is part of Proca and ensures that only you will be able to access this data. It does also mean that if you lose the Key, you cannot access the data gathered (and would have to create a new one for future data) by support sign-ups. This affects supporter sign-up data only — action data is stored separately anyway.
Encryption does not need to happen immediately when you make your account, but if data is collected before setting up encryption, then it won’t be encrypted. We, therefore, recommend setting it up before launching or publishing the widget.

When you first open the tab, it will look like this
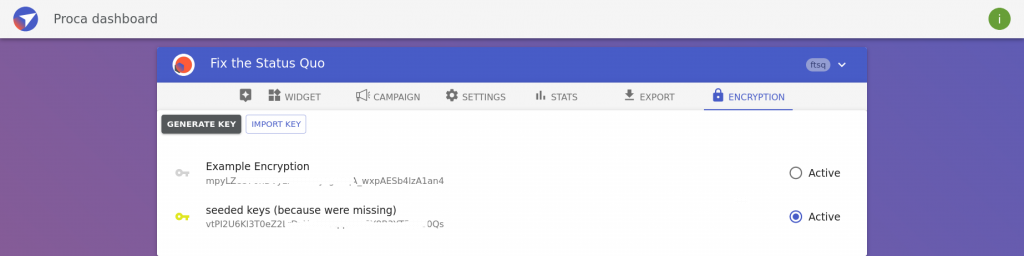
Once you generate a key and have encryption active, it will look like this
To generate your encryption key click ‘Generate key’ (near the top of the page). Give it a useful name (e.g. ‘Campaign Name Key Feb 2021’), and press ‘Generate Key’.
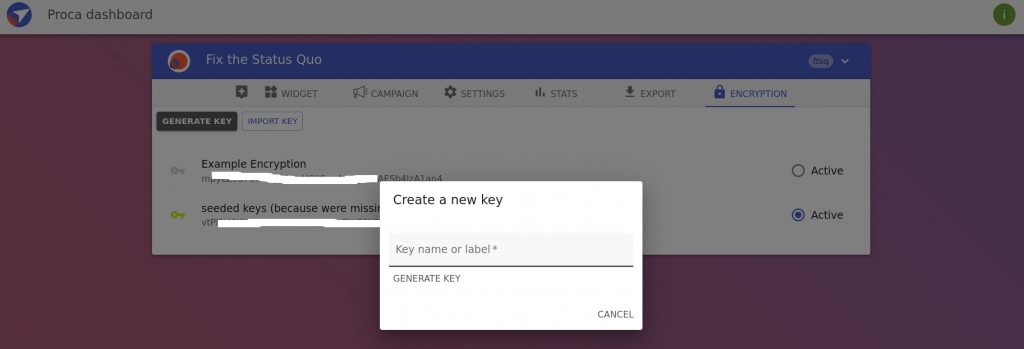
After it is generated, this pop-up will appear:
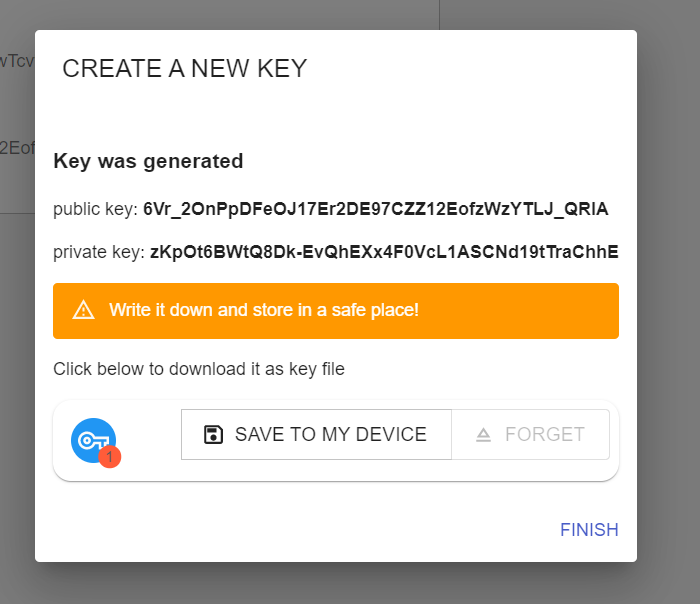
Either copy and paste it or download the key by clicking ‘Save to my device’, which will download the key as a file. Make sure you keep it findable and safe! You will be able to see the public key again, but never the private key. If you lose it, you will lose access to the supporter data collected.
It will then show as an active key on this tab as in the earlier photo.
Campaign Page
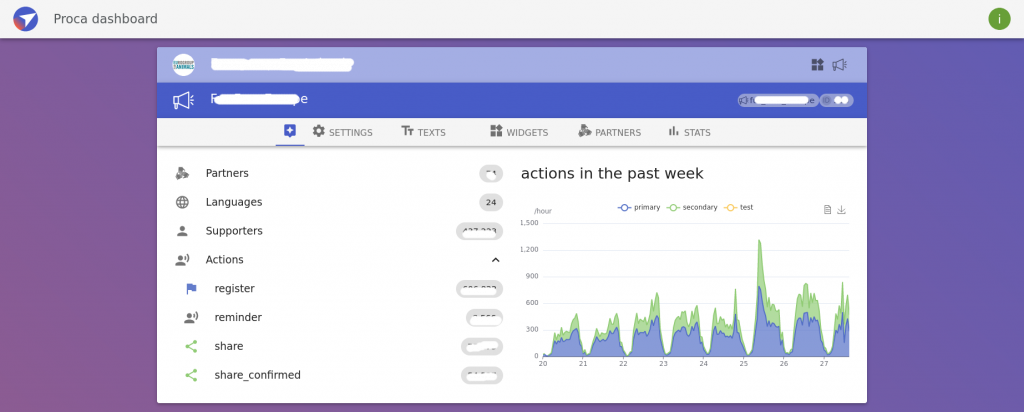
Coordinators can manage campaigns from the Campaigns page. On the Main tab are the total number of partners, supporters, languages, and actions in the campaign, along with last week’s statistics:
The Settings tab is for changing some parts of the campaign configuration, such as (un)required fields:

Changes in the campaign configuration will not be automatically reflected on widgets. You will need to rebuild each one on their main pages.
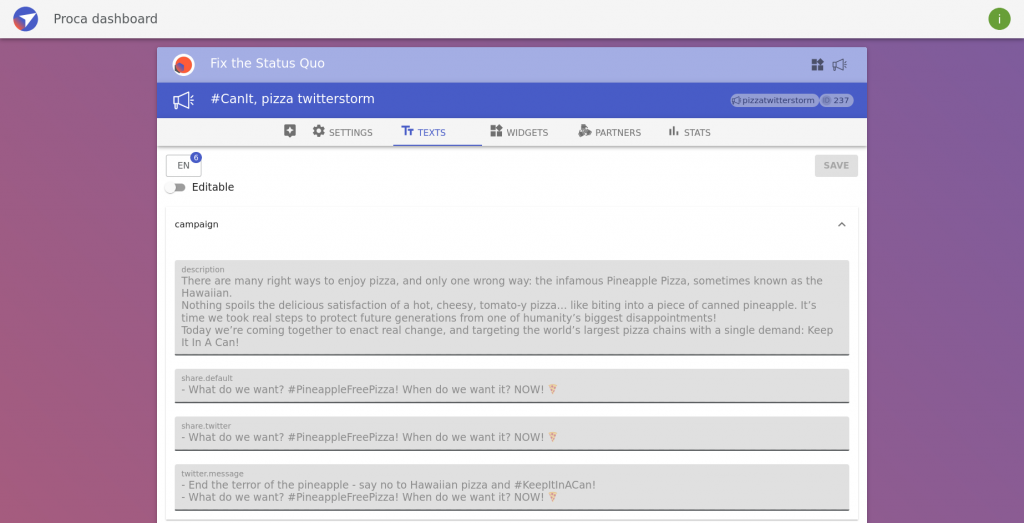
The Texts Tab opens up text and translation options for campaign text (more here).
The Add Language and Invite (translator) options are at the bottom of the tab.
The Widgets tab is another widgets list, and this one displays the list of all widgets in the campaign.
Campaigns usually have multiple widgets for different partners and languages..
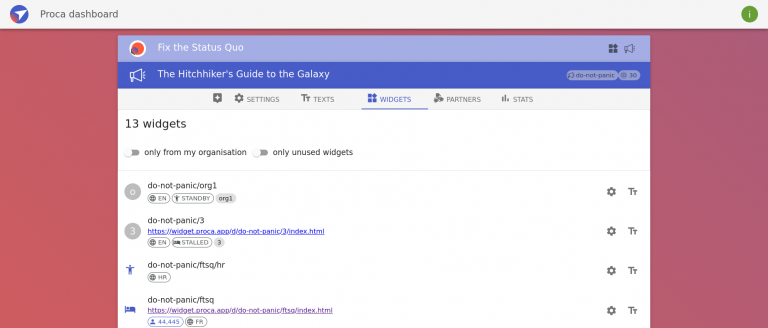
On the top of the tab, you can see the total number of widgets and two filters – my and unused.
Other organisations’ widgets will appear in the list, but you won’t be able to open their details tabs because of our privacy policy. To see widgets you don’t own, use the live link above the title of the widget. If there is no link, the widget has not been used yet.

The warning when trying to access other organisations’ widgets.
Clicking ‘Partners‘ brings up a list of partners, with the number of supporters each partner collected.
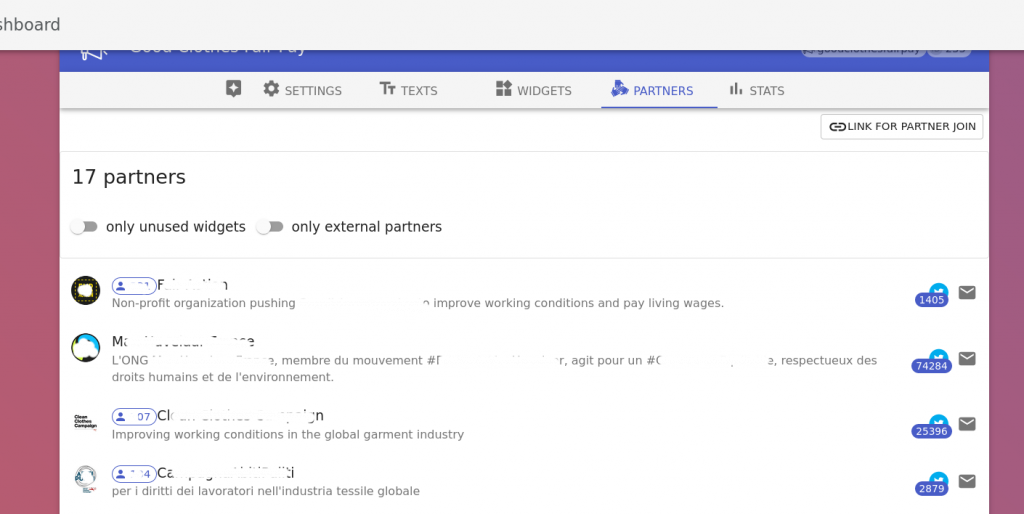
On the right side of the list, items are the number of followers onthe organisation’s Twitter account and an option to send an email to a contact person.
The button ‘Link for partner join’ to the top right of the tab has a URL to send to partners to go through onboarding to join the campaign. Send this link to anybody you would like to join, and it will take them to the start of the onboarding process!
Widget page
The setting, embed instructions, your widget’s data, and stats are all on this page.
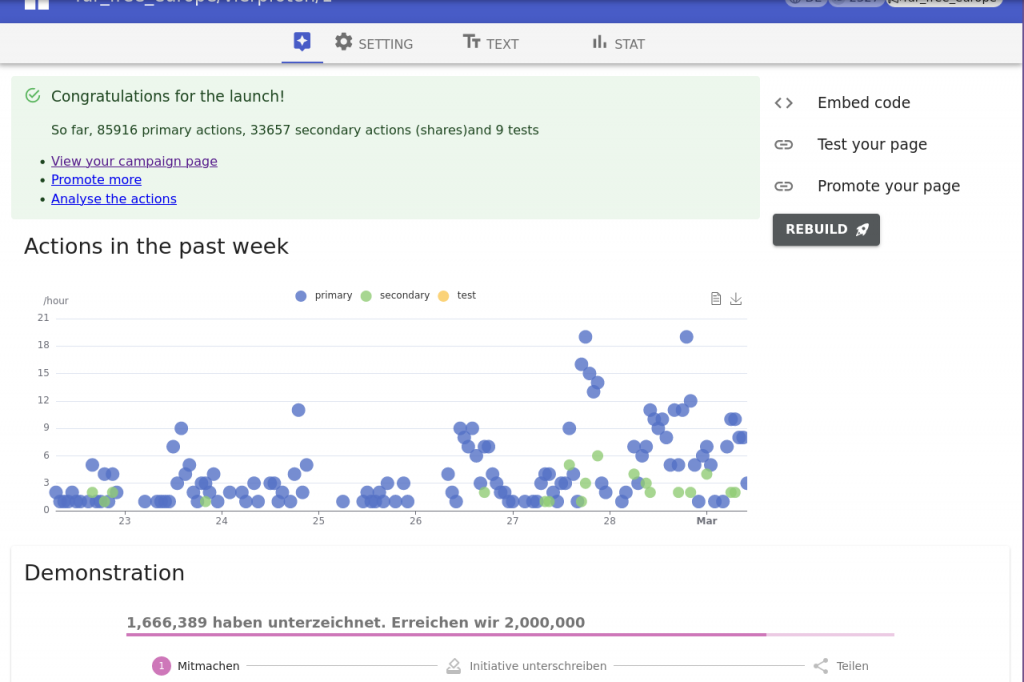
Depending on whether your widget is used or not, you will see one of three versions of the Main tab.
- Main tab for the unused widget
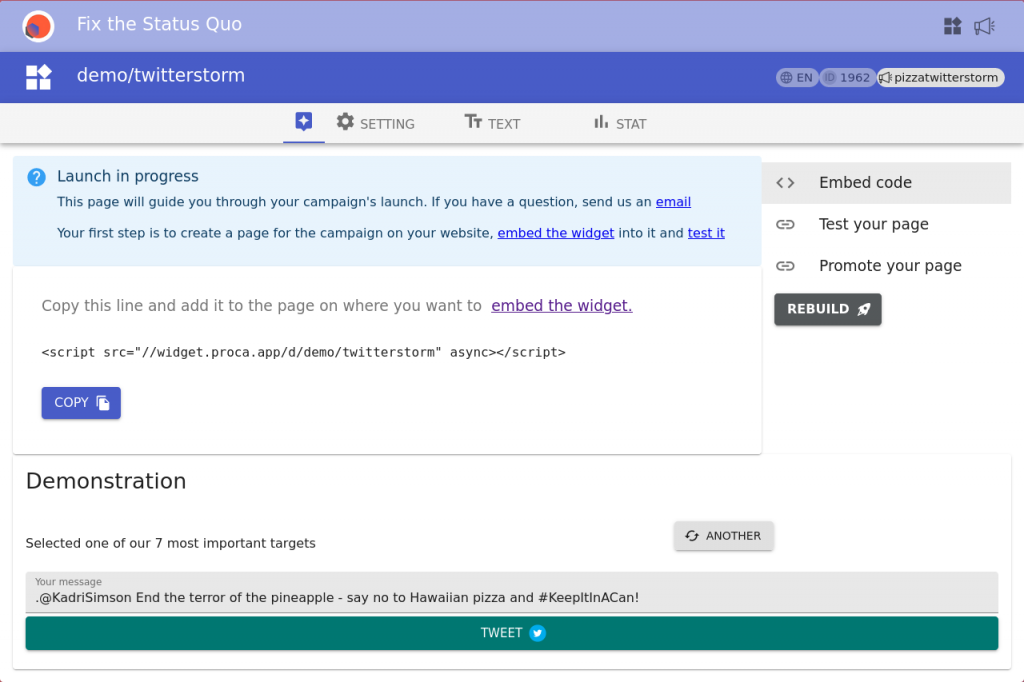
- Main tab for the widget with less than 100 supporters
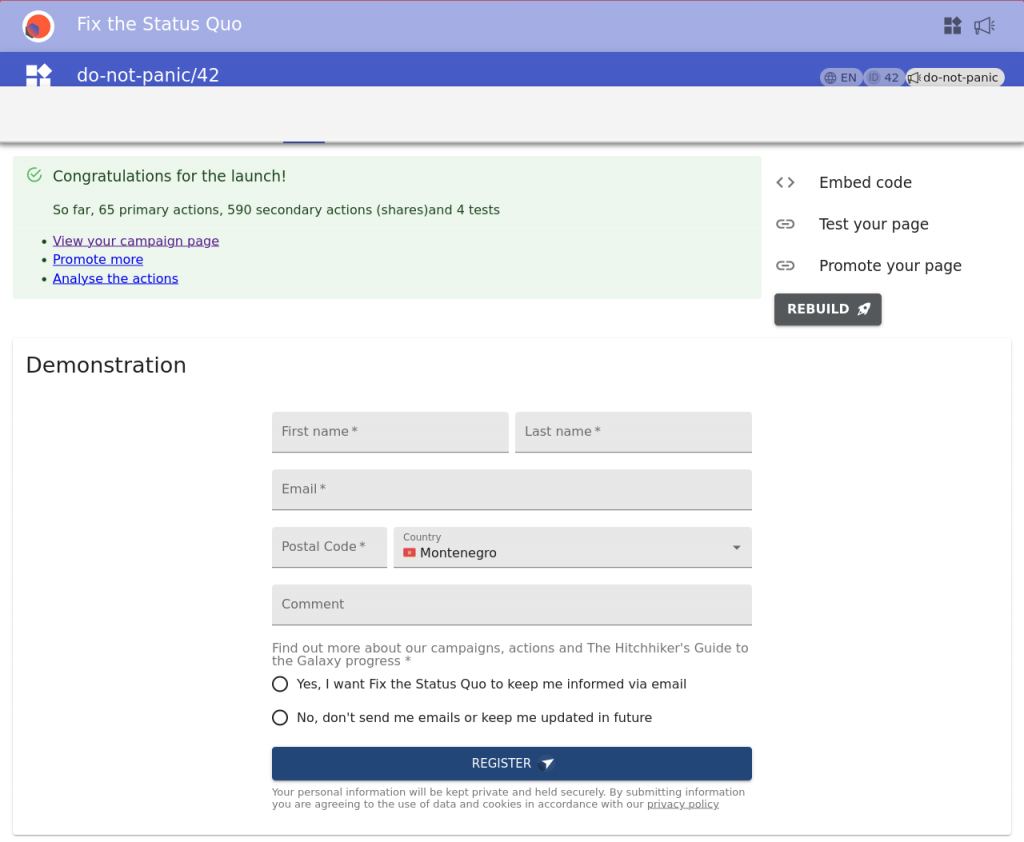
- Main tab for used widget
The menu on the top left opens additional features useful for handling the widget.
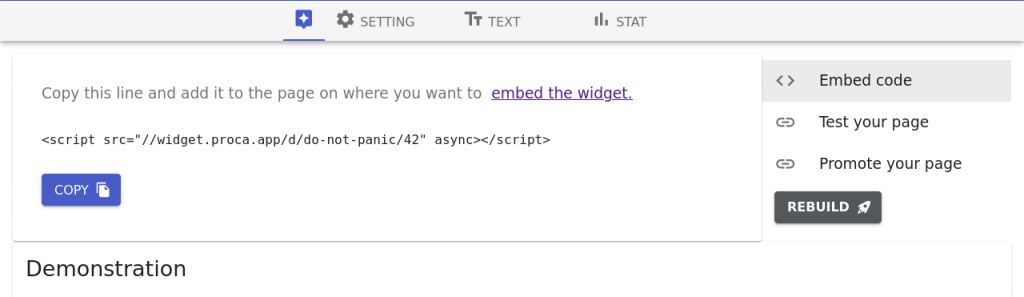
The code will be displayed by default if your widget is not yet embedded. Otherwise, you can always access it by clicking on this option.
Here are the instructions on how to put the widget on your website.
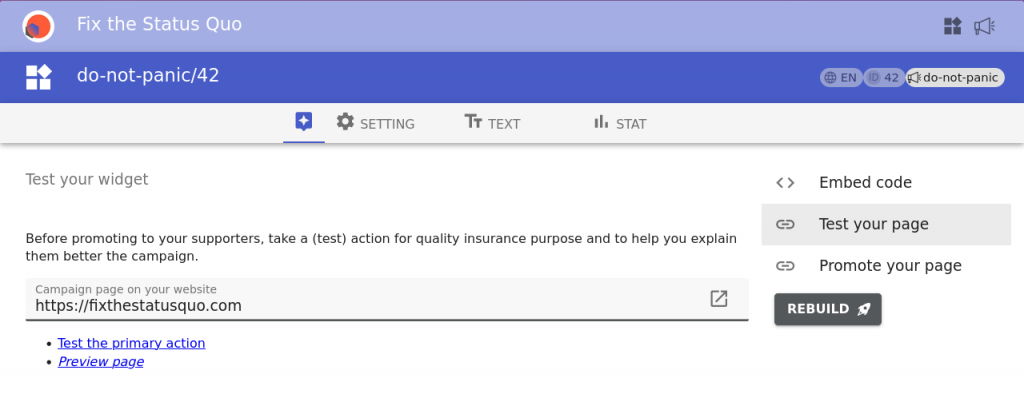
Do not forget to put ‘https://’ at the beginning of the URL if you are using this option!
You can test your widget at any time by adding ?proca_test to the end of its URL. Actions taken in this mode will not be counted.
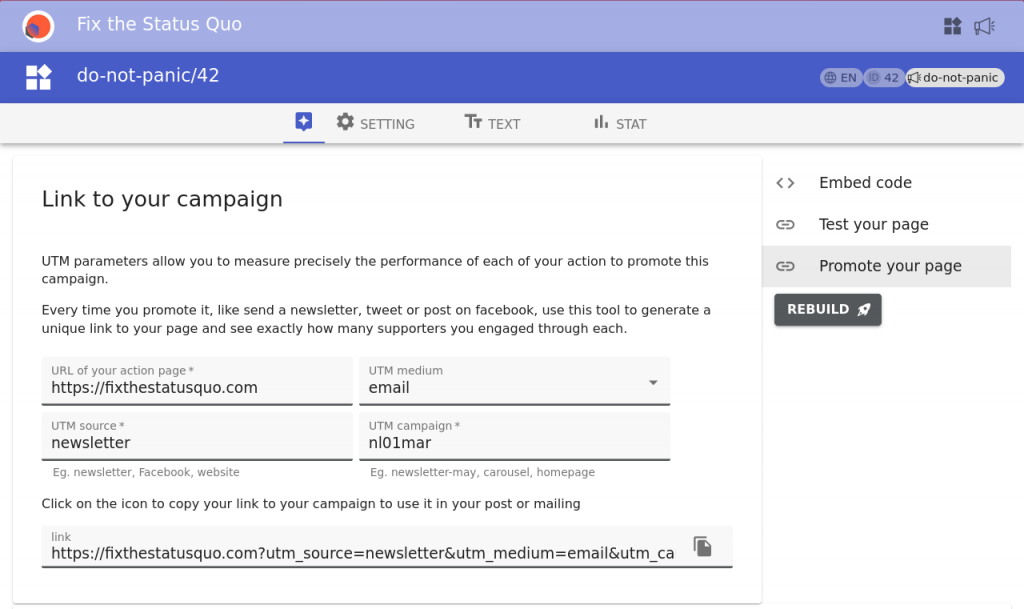
We strongly suggest using UTM parameters to track where your supporters are coming from.
Some variables are prefilled but can always be edited using four upper inputs. At the bottom, you can see (and copy) the whole URL.
If you are not familiar with UTM standards, you can find more information here.
You can change parts of the widget configuration on the Setting tab. Don’t forget to hit “Save”!
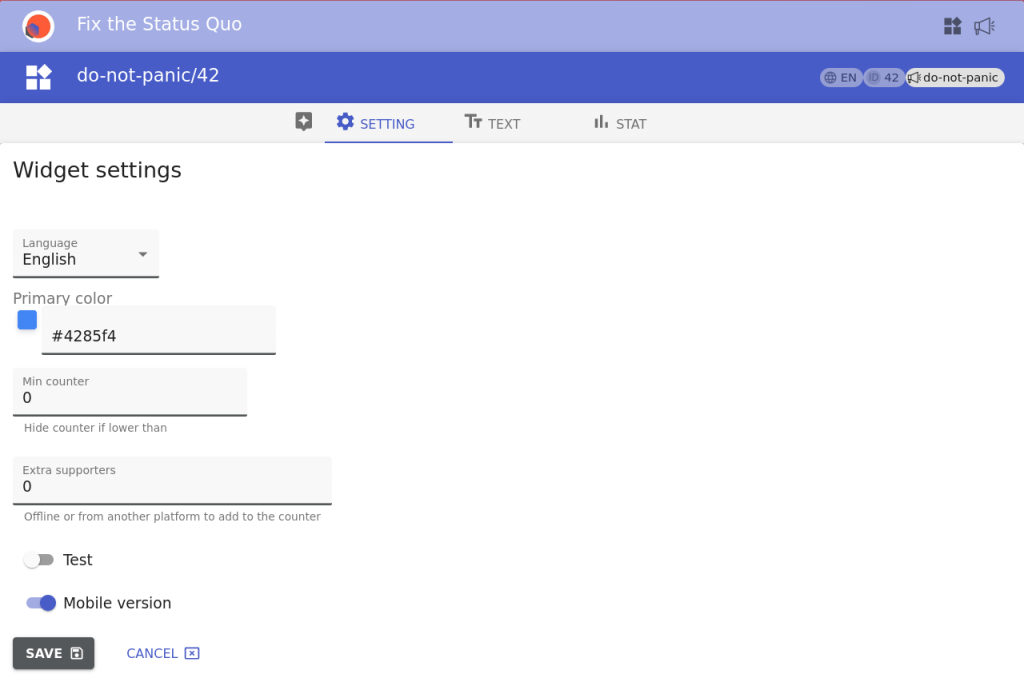
- You can choose all EU languages and many others from the list
- The widget can be in any color you want, as long as that color has a valid hex code.
- Our counter looks awesome on top of the widget, but you may want to hide it in the early stages of the campaign. Just put the number of actions when the counter should appear.
- If you are collecting actions on some other platform, you can add the total number using the “Extra supporters” input.
- You can enable/disable test mode and mobile layout.
If you want to adjust some of the texts displayed on your widget, use the Text tab.
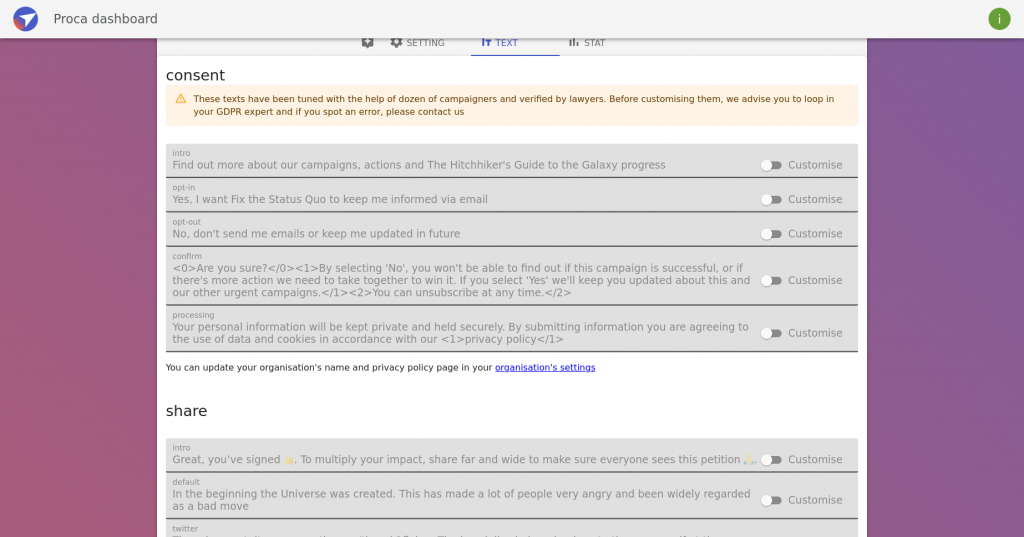
Here you can find more information about widget customization https://fixthestatusquo.com/guide/customise/.
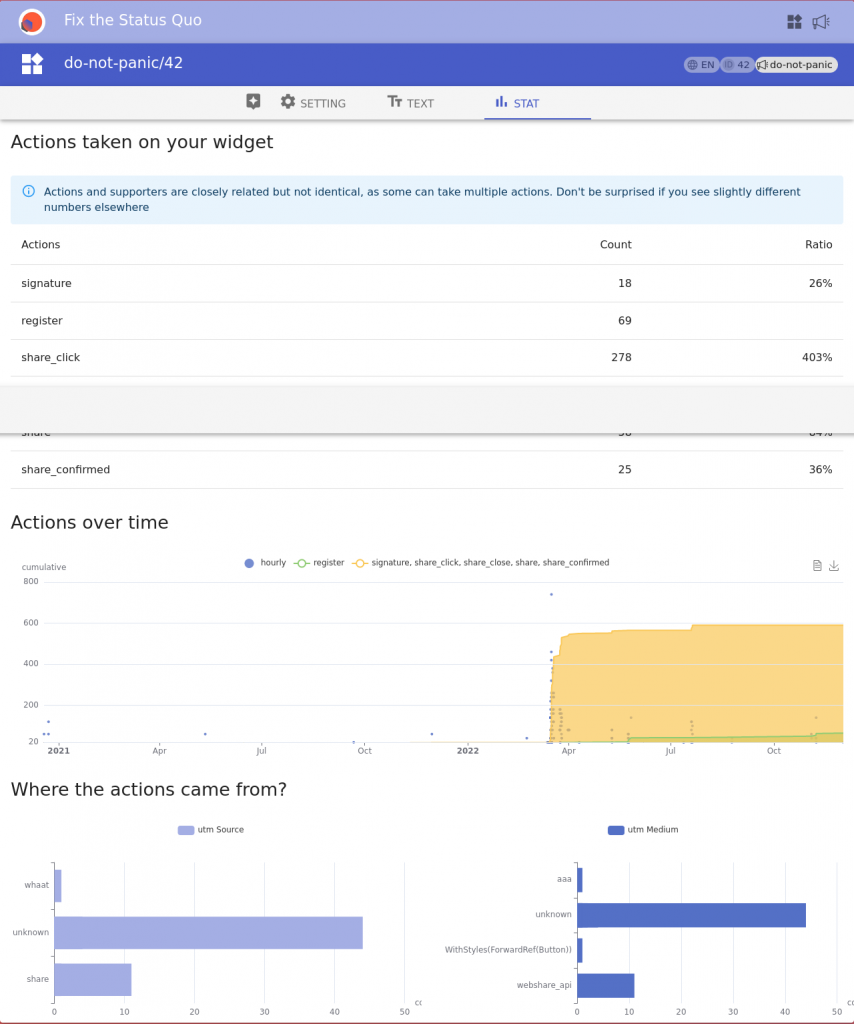
Besides the widgets statistic, on the Stats tab, you can see why the UTM code is important (“Where did the actions come from?” segment).